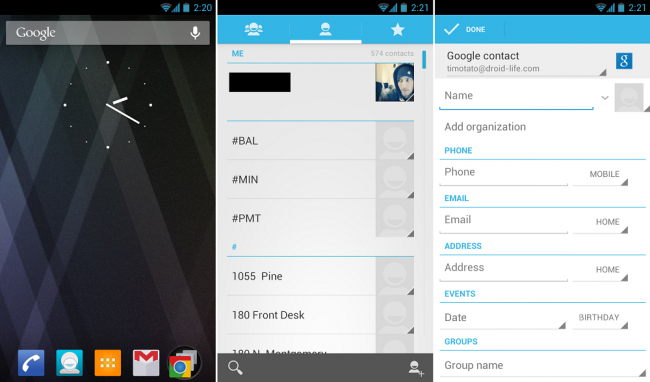
When setting up your Google account on an Android device, it will port all of your already saved numbers to that device. But what if you want to add a new contact to your account after the fact? There are a couple of ways to go about this, so let’s get started.
Standard Method:
1. From your homescreen, open your app drawer.
2. Locate the People application and open it.
This is where you can find and edit all of the contacts that are synced to your Google account.
3. In the bottom right hand corner, there is a little head with a plus symbol. That is the Add Contact icon. Select it.
4. Fill out the new contact’s name and any information you want associated with that contact (email, phone number, address, pictures, etc.).
5. Hit “Save.”
You have now added a contact to your Google account that will remain there until you delete it.
Alternative Method:
One of the other ways to add a contact to your account is straight from the Dialer/Phone app. Here is how to accomplish that task.
1. Once you have a number entered into the Phone app, hit the settings key.
2. Select “Add to contacts.”
3. At the bottom of your display, select “CREATE NEW CONTACT.”
4. Fill out any additional information and hit “Save.”
*Android Beginners Guide is a way for people new to Android to get to learn how Android works. We will be posting many tips and tricks on how to optimize your usage of the Android operating system.

Collapse Show Comments32 Comments