With the release of the Jelly Bean operating system, it brought many new features for Android users to take advantage of. One of new features is called Sound Search. Sound Search can be directly compared to other applications like Shazam and SoundHound, the main difference being that Google’s Sound Search utilizes their own servers to recognize the music and then direct you to Google Play to purchase the song.
Google created a Sound Search widget that you can easily place on any homescreen for you to find out what that certain song is. Let’s go ahead and set it up.
First, you will need to place the widget on a homescreen. To do this, follow these directions.
Setting up the widget:
1. Open the app drawer. In the top left you will see two sections. One for “Apps” and one for “Widgets.”
2. Hit “Widgets.”
3. Scroll to the right until you find Google’s Sound Search widget.
4. Long press on the widget to place it on a homescreen.
You have now successfully enabled the Sound Search widget.
Using Sound Search:
Using Sound Search is just as easy as setting it up. Follow these directions to use Sound Search properly.
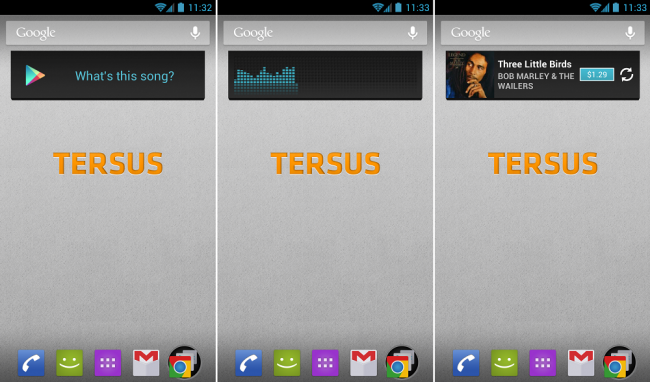
1. While the song is being played, tap on the Sound Search widget.
2. Place your device close to the speaker to make sure the device can hear the song/audio being played.
3. After a few seconds, if the song is recognized by Google, album art and the song’s title will be displayed.
4. Along with this information is a price for the song on Google Play, followed by a refresh button for you to identify a new song.
5. To purchase the song, click on the price tag and you will be directed to Google Play to buy the song or the entire album.
*Android Beginners Guide is a way for people new to Android to get to learn how Android works. We will be posting many tips and tricks on how to optimize your usage of the Android operating system.


Collapse Show Comments44 Comments