Some of you caught on to the fact that I was taking screenshots on my newly updated 2.1 Droid the other day for both the ultimate live wallpaper guide and our digg quick app review without being rooted. (Say what?) And it’s true, there is a way to take screenshots on your Motorola Droid without actually having root access and that method is through the Android SDK.
It’s probably time I let the secret out and walk you through a tutorial on it. This may be rough, but will my best attempt at taking you through the successful installation of the Android SDK to get you all screen capping in no time!
Follow the entire process after the jump
Instructions…
1. First thing we need to do is download both the Android SDK which is compatible with your operating system and the Java SDK.
2. Once they have finished downloading, go ahead and install the Java SDK.
3. Then unzip the Android SDK into a folder you will remember later.
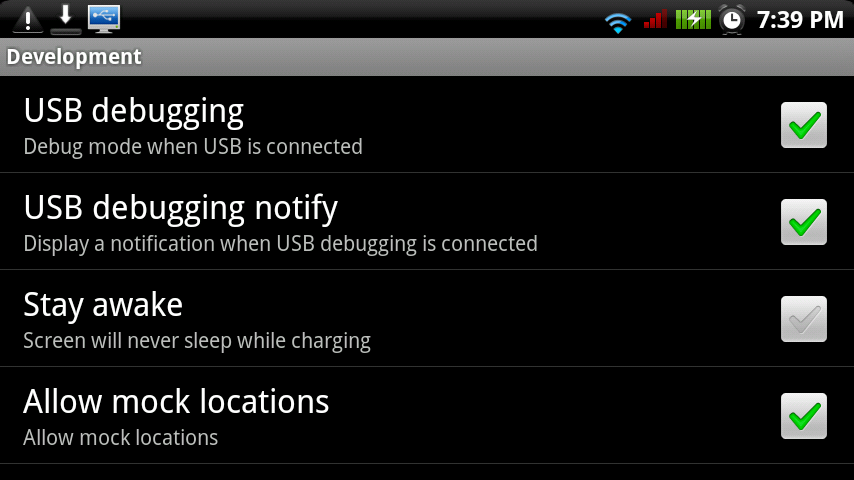
4. While those steps are finishing up, go into your Droid app settings and check the box for “USB Debugging.” (Settings>Applications>Development>USB Debugging)
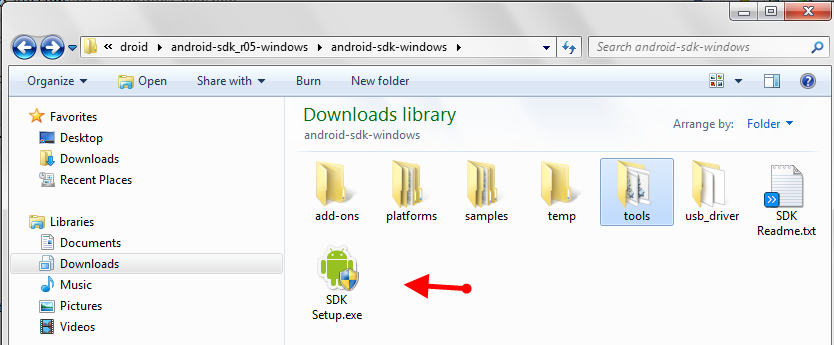
5. Head back to the folder where you unzipped the Android SDK, look for the “SDKSetup.exe” and run it.
6. When the setup opens, you will be prompted with “Choose packages to install” at which point you can choose which APIs and other software you want to install. The most important package you need to install is likely at the bottom and should be titled “USB driver package.” Make sure to “accept” that. At this point you can also start unselecting unwanted packages, but should probably keep the 2.1 and 2.0.1 APIs.
7. Click “install” and allow for whichever APIs you’ve selected and the USB driver to download and install.
8. Once everything has finished, go ahead and connect your Droid to your PC via USB cable.
9. If for some reason your Droid is not recognized by your computer, you now have the USB drivers ready for installation in the Android SDK folder you unzipped earlier (called usb_driver). Please move forward with USB driver installation at this time if you need to. The rest of you can go forward to step 10.
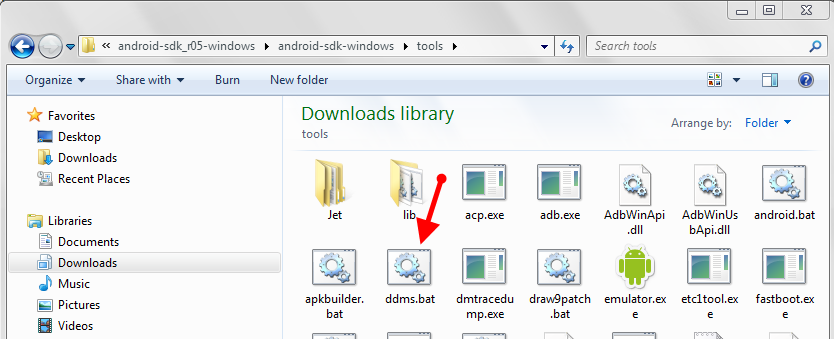
10. In your Android SDK folder, open the folder titled “tools” and look for “ddms.bat”.
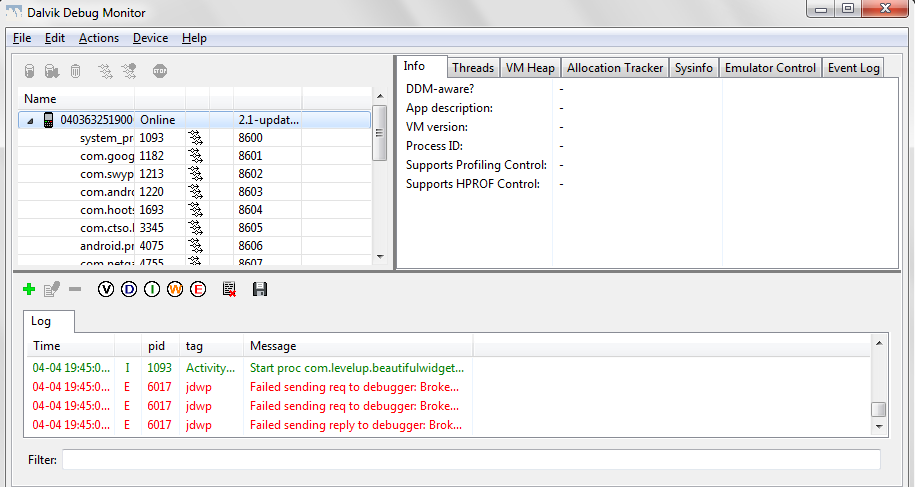
11. Open “ddms.bat” and wait for your phone to connect. You’ll know it’s connected when the “Log” starts becoming populated with info.
12. On your Droid, navigate to whichever screen you wish to take a screen shot of.
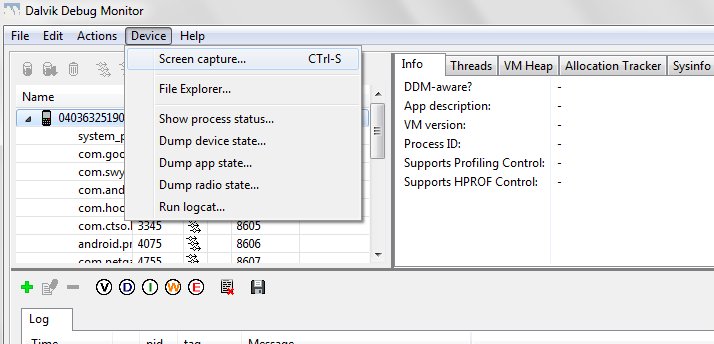
13. Choose “Device” and “Screen Capture” in DDMS.
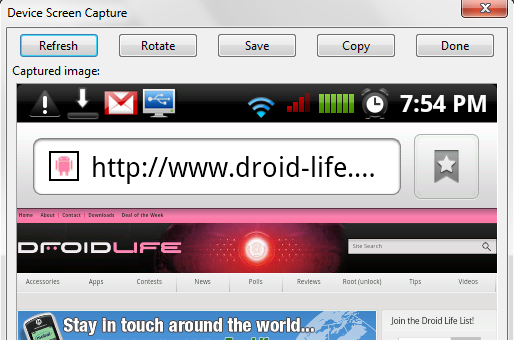
13. DDMS will take a screen shot and let you preview it.
14. Click “Save” or any other option you wish and you have officially taken your first screen shot! BAM!
And feel free to share any of your fabulous screenies. I’d love to see how everyone rolls with a screen shot of your desktops. Enjoy!

Collapse Show Comments66 Comments